Temperatue Setting for Easy Press to Iron on a Koozie
Links may be partner or affiliate links, including Amazon Associates.
Questions or comments? I'd love to hear from you! Email me at camille@growingupgabel.com.
Jump to How-To
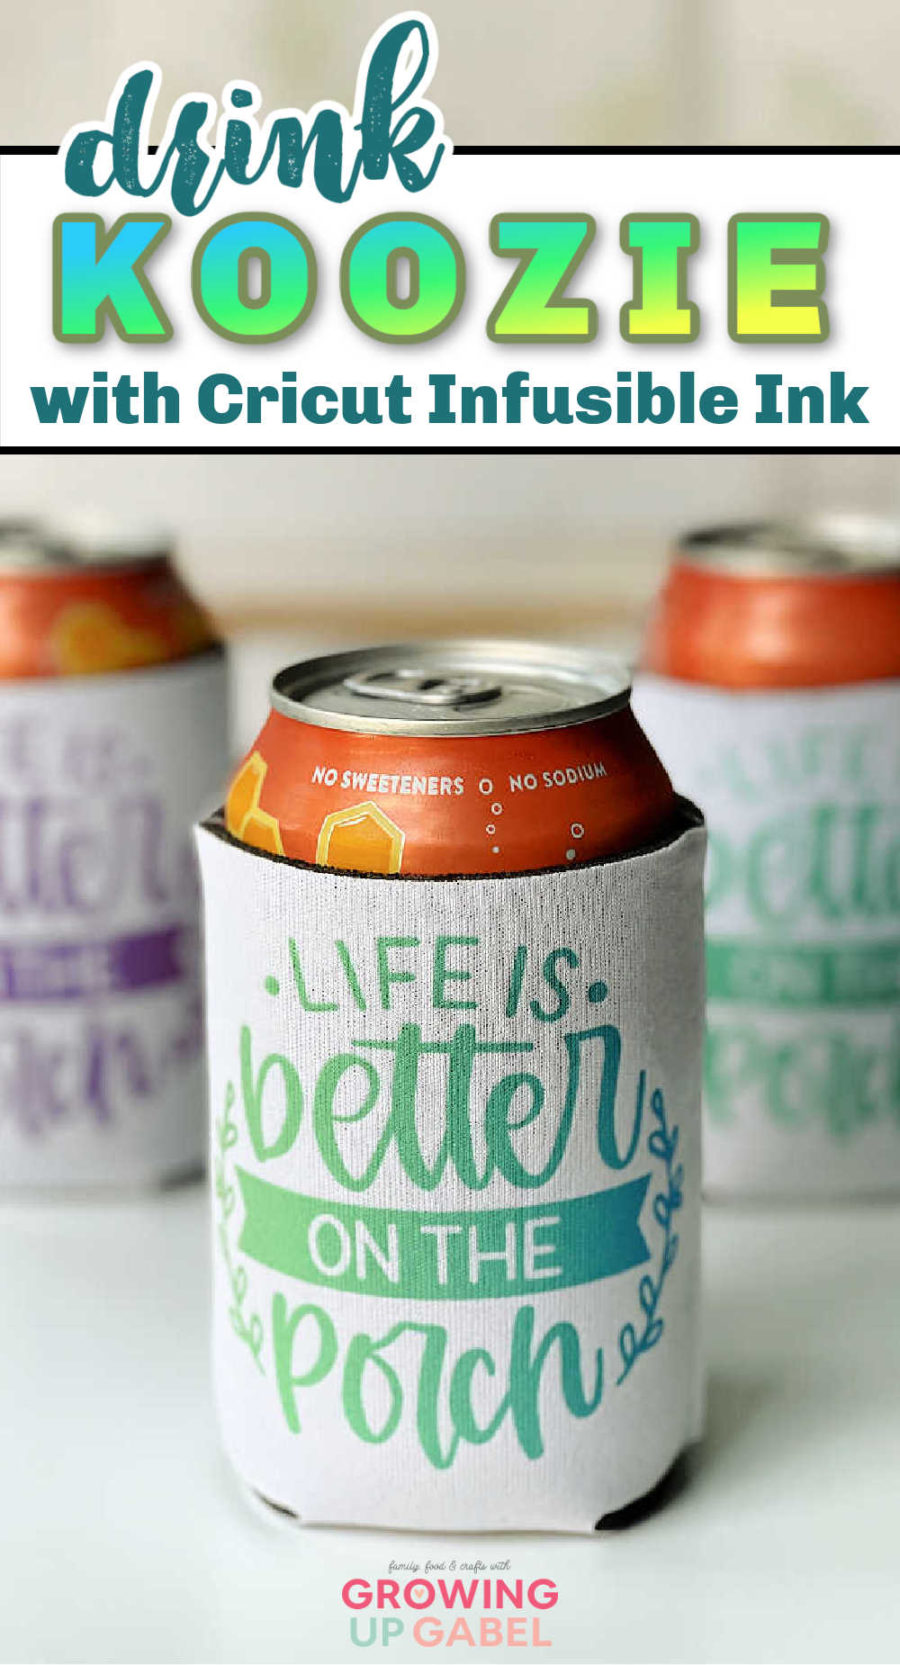
You don't need vinyl to make a Cricut koozie. Instead, use Cricut Infusible Ink to create colorful personalized koozie designs.
Learn how to make personalized koozies using a Cricut cutting machine and Infusible Ink. The Infusible Ink fuses directly with the koozie to create a seamless design that is bright and beautiful. Create your own design or use ours in Cricut Design Space. Cut the design out on a Cricut Joy or other machine. Weed the Infusible Ink and then use a Cricut EasyPress to transfer the design to the koozie.
How to Make Cricut Koozies with Infusible Ink
Cricut Koozie Supplies
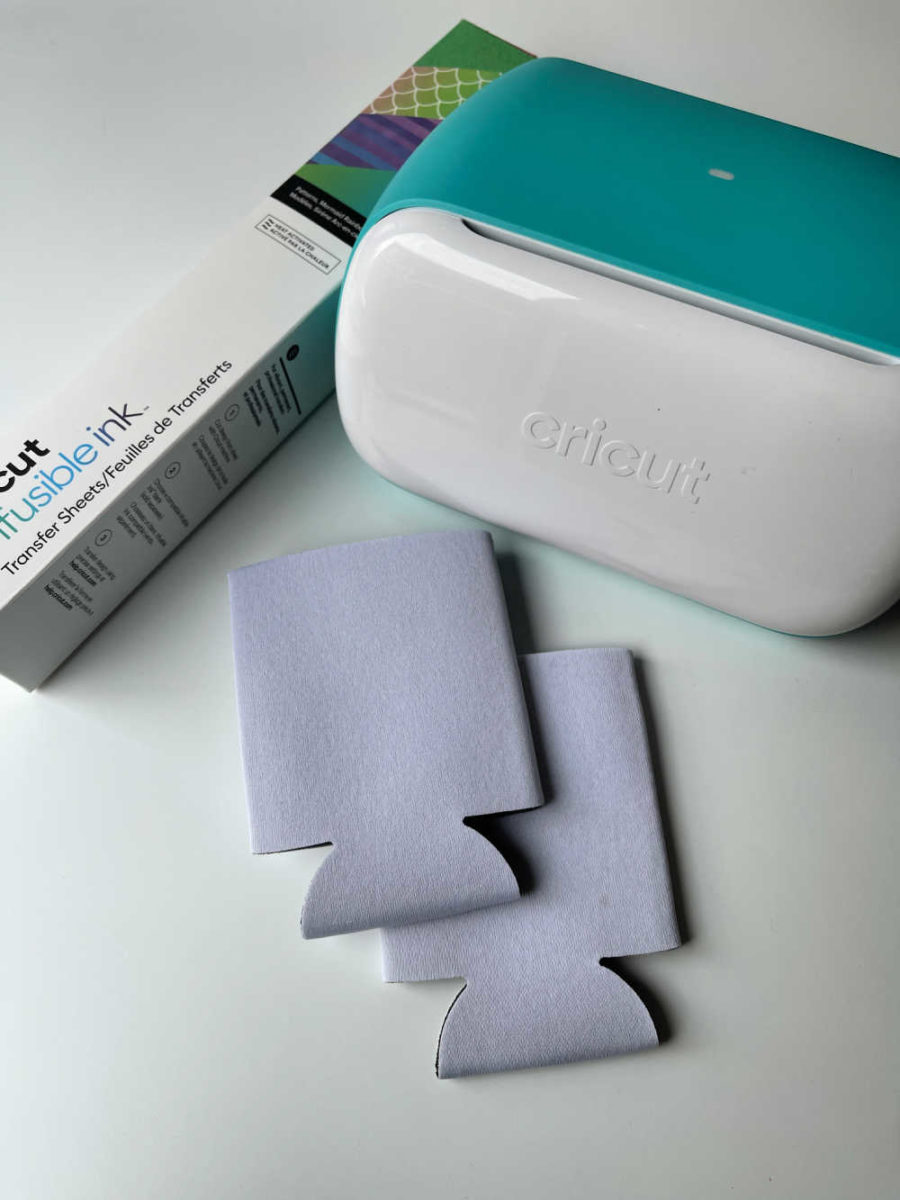
- Cricut smart cutting machine – we used a Cricut Joy
- Design Space software on mobile device or computer, or Cricut Joy app
- Cricut Heat Transfer Guide
- StandardGrip Machine Mat
- Cricut EasyPress 2, Cricut EasyPress, or Cricut EasyPress Mini
- Cricut EasyPress Mat
- Can Koozies compatible with Infusible Ink
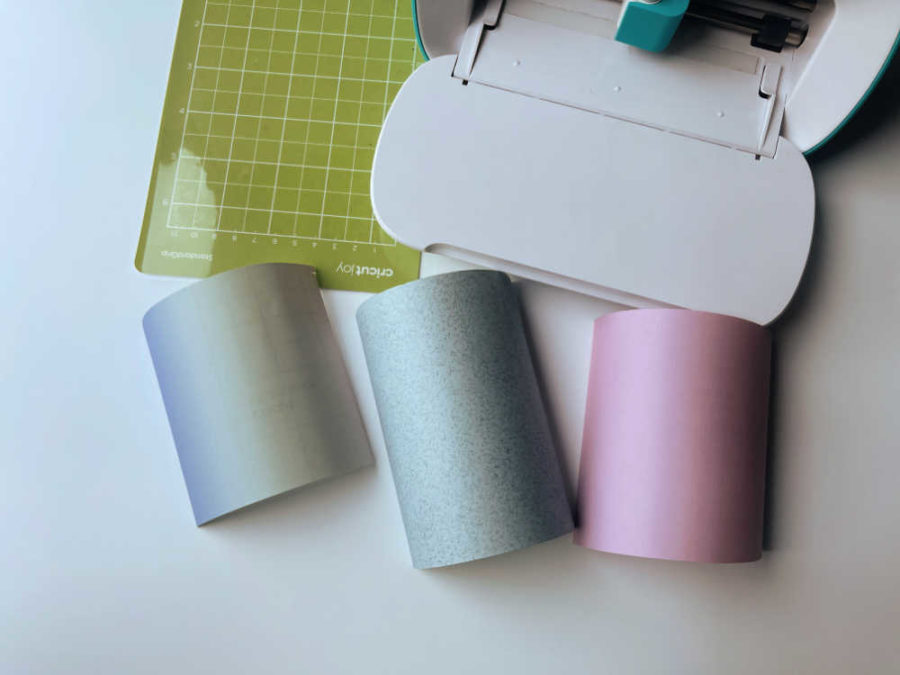
- Infusible Ink Transfer Sheets – we used the Mermaid Pack
- White cardstock (80 lb.)
- Butcher paper – included with the Infusible Ink Transfer Sheets
- Lint roller
- Heat Resistant Tape (optional)
- Scissors
Cut the Design
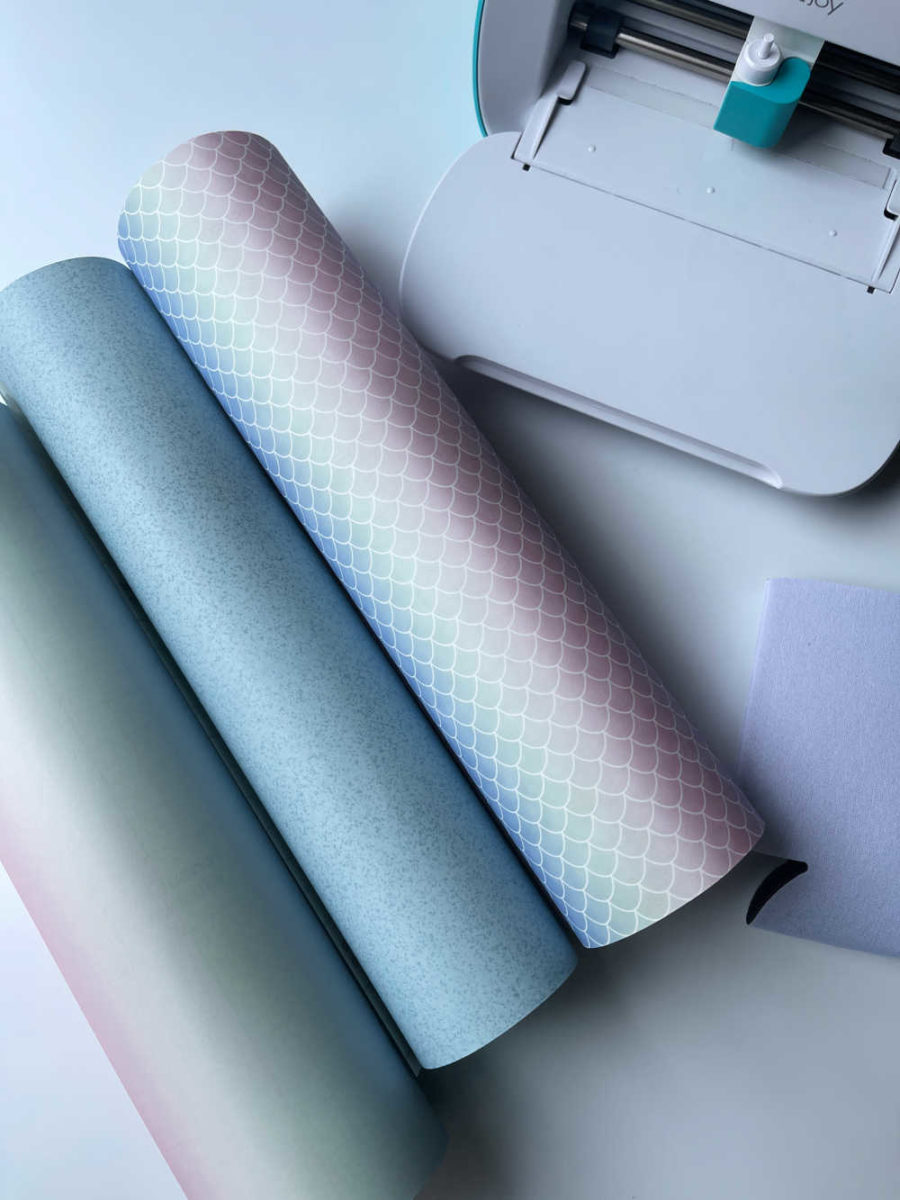
We used Infusible Ink to make the can Koozie. You could also use HTV. We choose to use Infusible Ink because an Infusible Ink transfer becomes one with the material itself.
When using HTV or iron-on the design is attached on top of a base material using adhesive. The results of Infusible Ink are colorful, beautiful, smooth transfers that never flake, peel, wrinkle, or crack.
Infusible Ink works best on fabrics that have a high polyester count and on white or very light-colored fabrics.
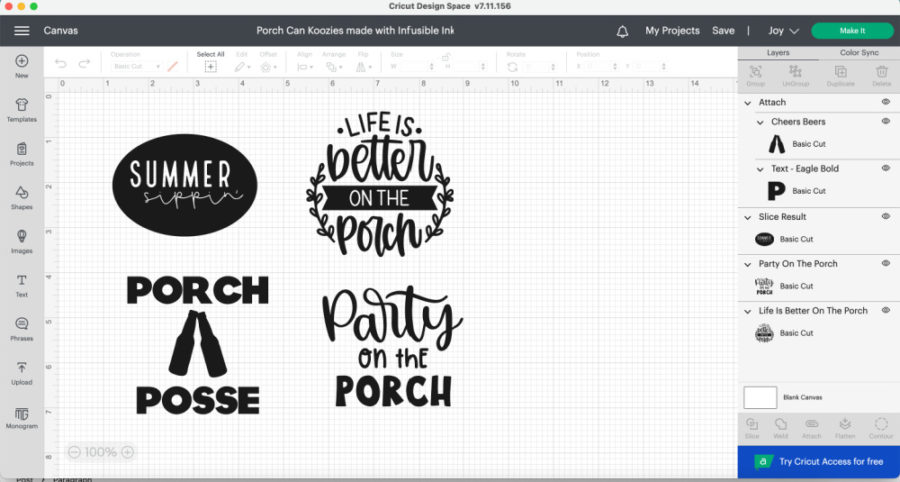
Open Design Space either on your computer or mobile device. The project is called "Porch Can Koozie with Infusible Ink" and can be found in my Design Space account. Make sure to follow me and I will follow you back!
There are 4 different designs available. You can use them all or whichever one you like. Just hit the eye on the right side of the screen to hide the designs you don't want to use.
Size the design you like to fit your Koozie. Our Koozies were 3.5″ so the designs are made to fit just over a 3″ square design. You can adjust the size you need or want for your Koozies.
Once your design is ready to go, click "Make it." Be sure to Mirror your design.
Cut the Infusible Ink sheets down to the size you need to cut out the design.
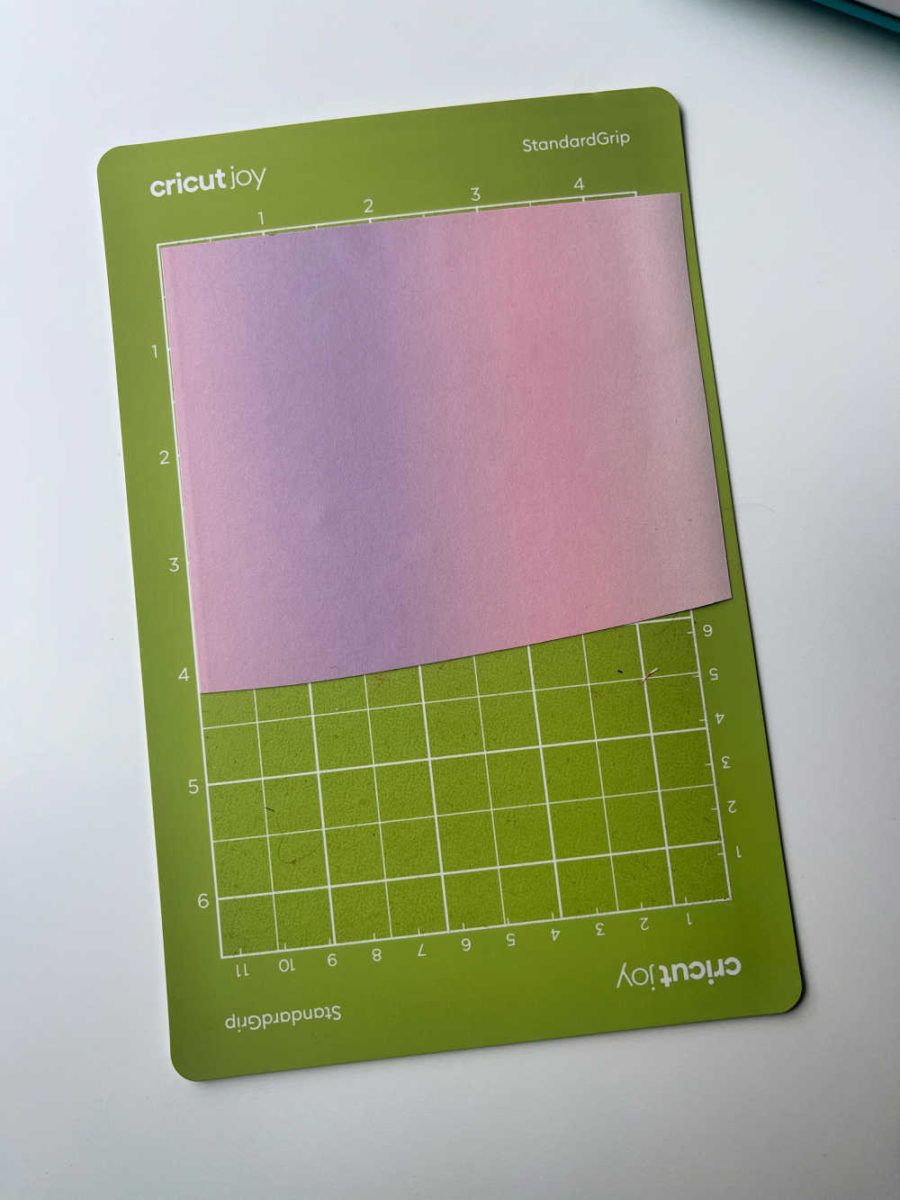
Place the cut sheets onto a StandardGrip mat, liner side down, ink side up.
Select Infusible Ink Transfer Sheet from the list of materials. If using a Cricut Explore 2 machine, turn the Smart Set Dial to Custom first.
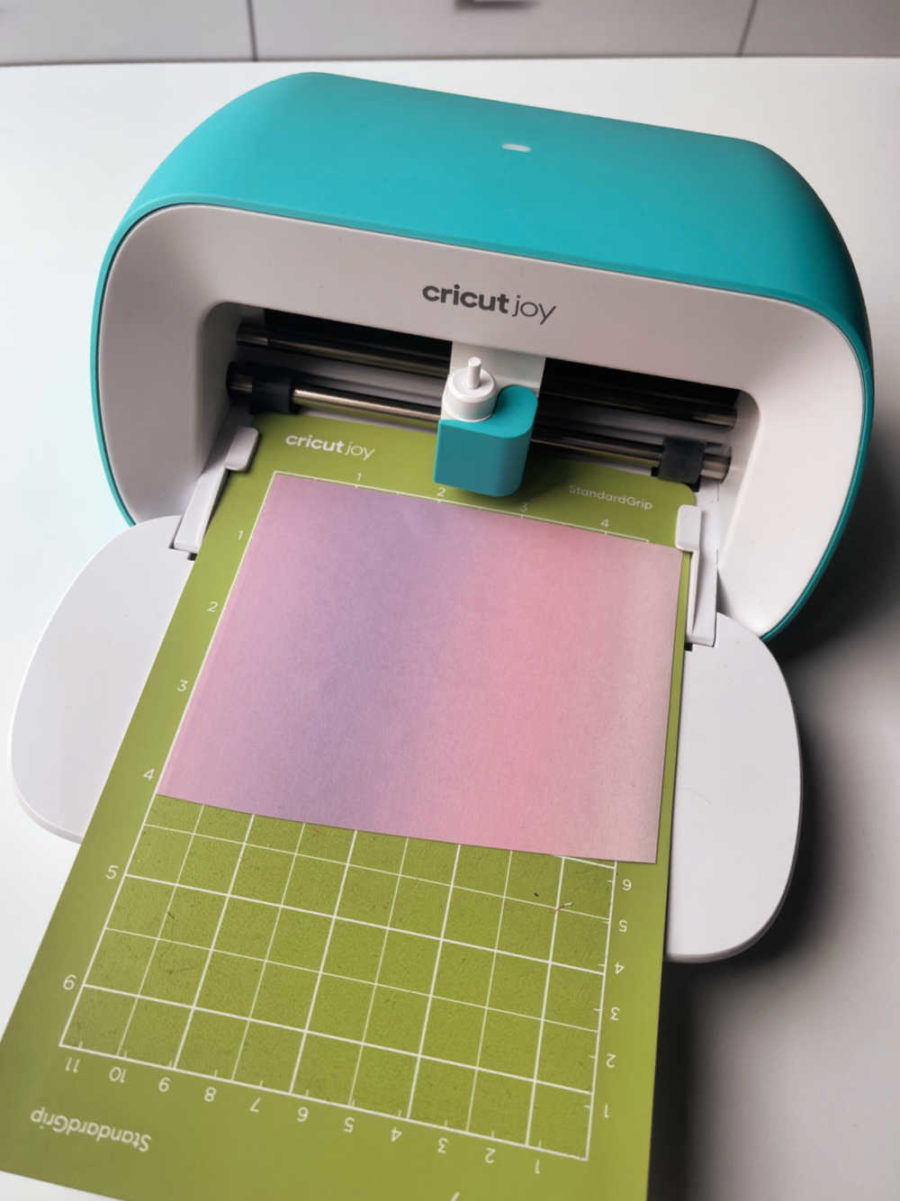
Load mat and blade into the machine and press Go. The machine will make the cut.

When done, unload the mat from the machine. Carefully remove the Infusible Ink sheet from the mat.
Weed the Design
Weeding Infusible Ink is a little easier than vinyl or HTV because it's a little bit sturdier. Remove the Infusible Ink sheet with the cut design from the mat and trim away any unused area of the sheet.
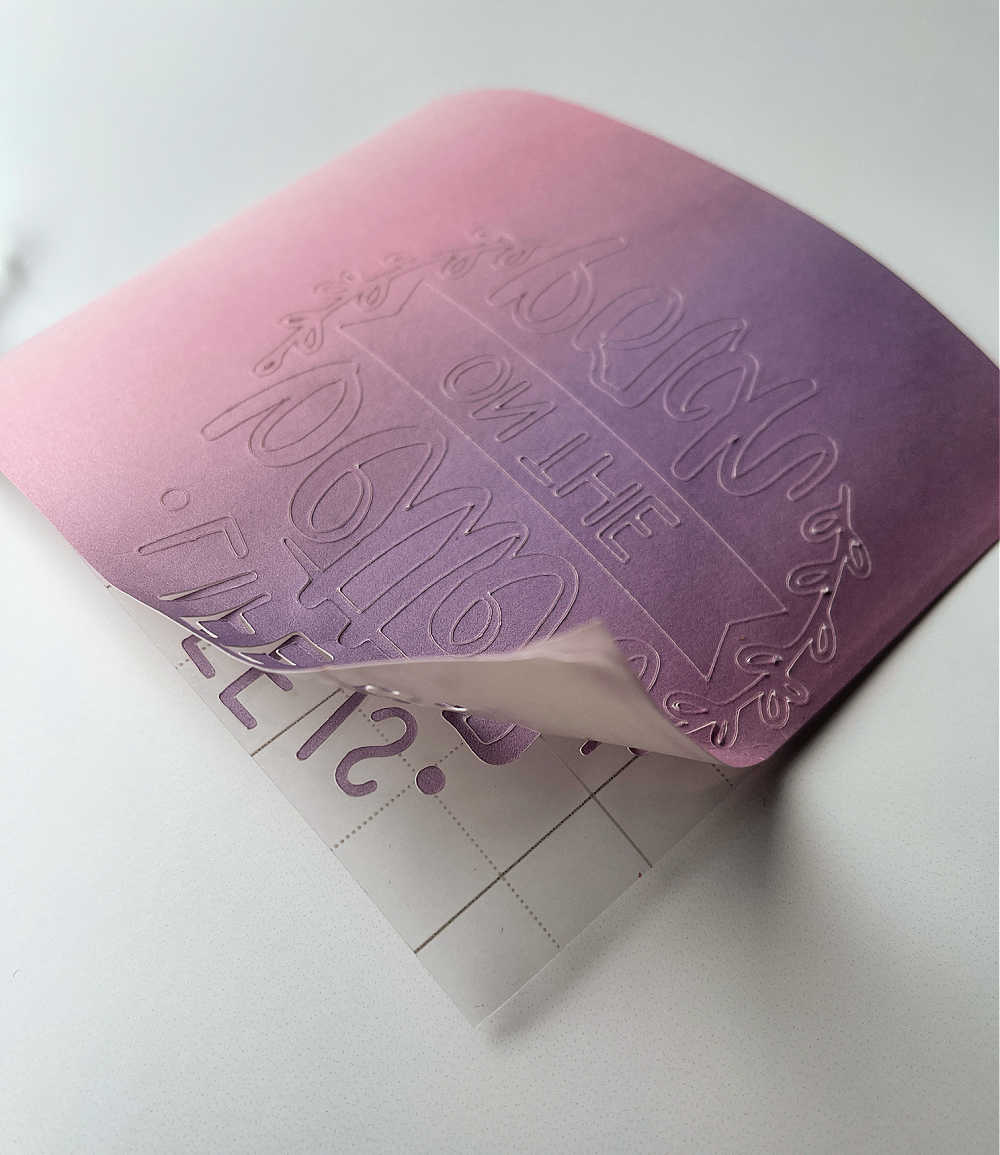
Gently bend the cut design so cut lines separate and are more visible. "Cracking" the cut this way makes it easier to remove excess paper around your design.
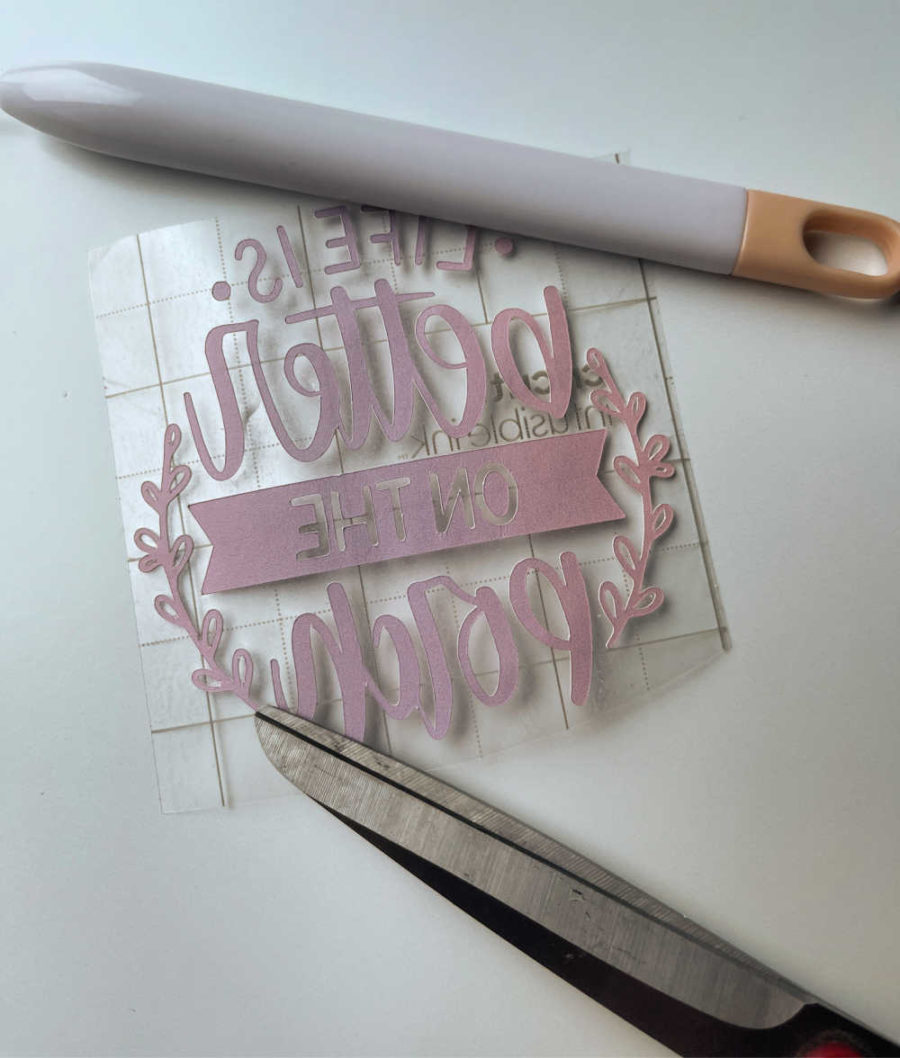
Use your fingers or tweezers to carefully remove negative pieces from in and around your design, leaving the design on the liner. Trim clear liner if necessary so that it does not extend beyond the Cricut EasyPress heat plate.
Prep the Koozie and Easy Press
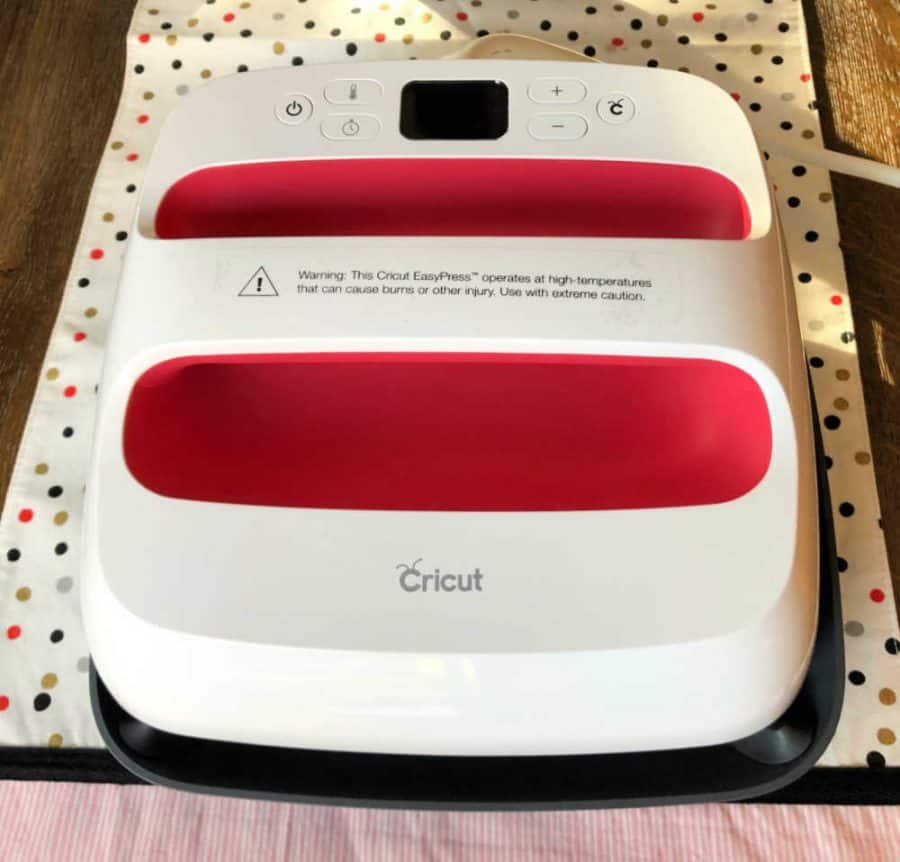
Preheat your Cricut EasyPress. For precise temp, time, and pressure settings for your project, always refer to the Cricut Heat Transfer Guide. For our koozies, we used the setting for a tote bag. We set the press to 385 degrees for 40 seconds with light pressure.
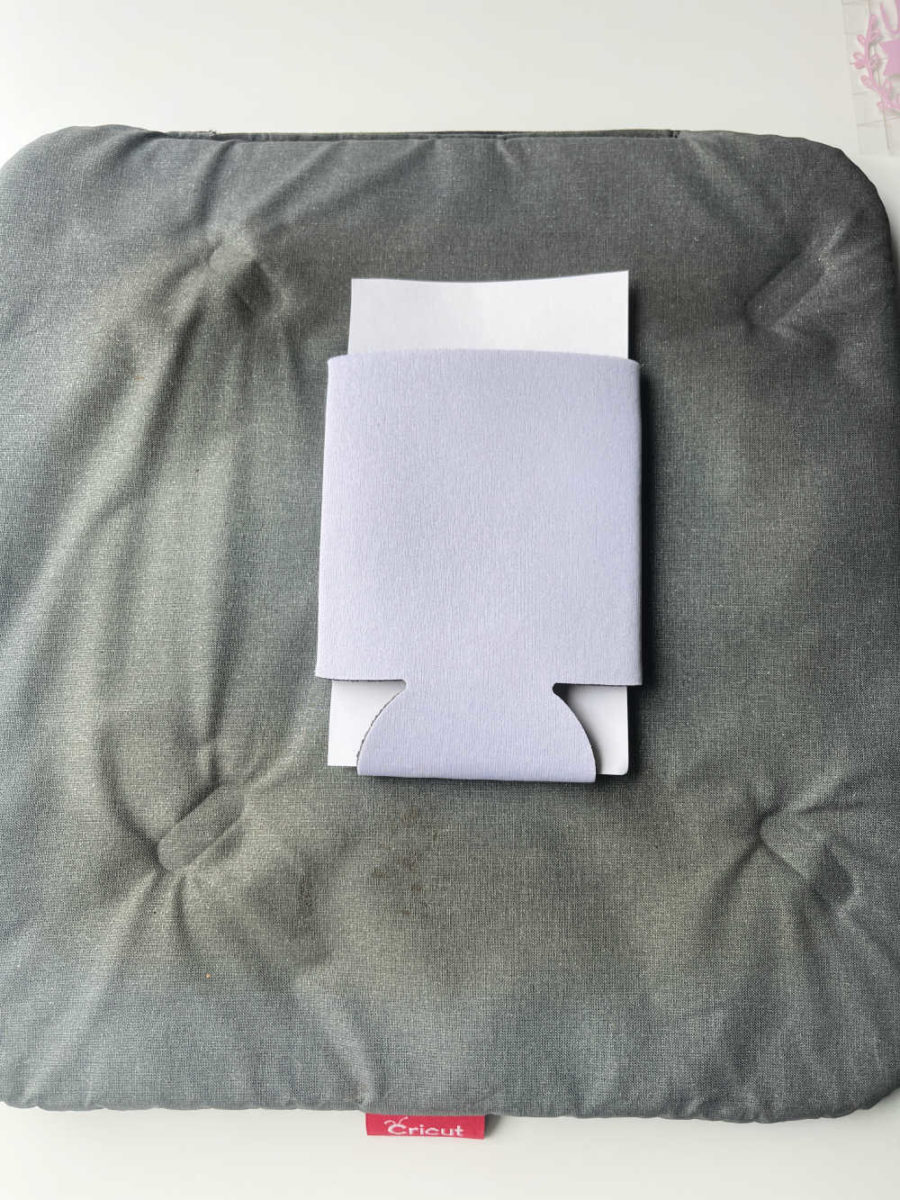
Trim a piece of white cardstock so that a small piece fits inside the koozie. Use a lint roller to clean off any dust or dirt from the koozie. Do not skip this step! Even debris or fibers too small to see may cause imperfections in the final transfer. Place the koozie on the EasyPress Mat.
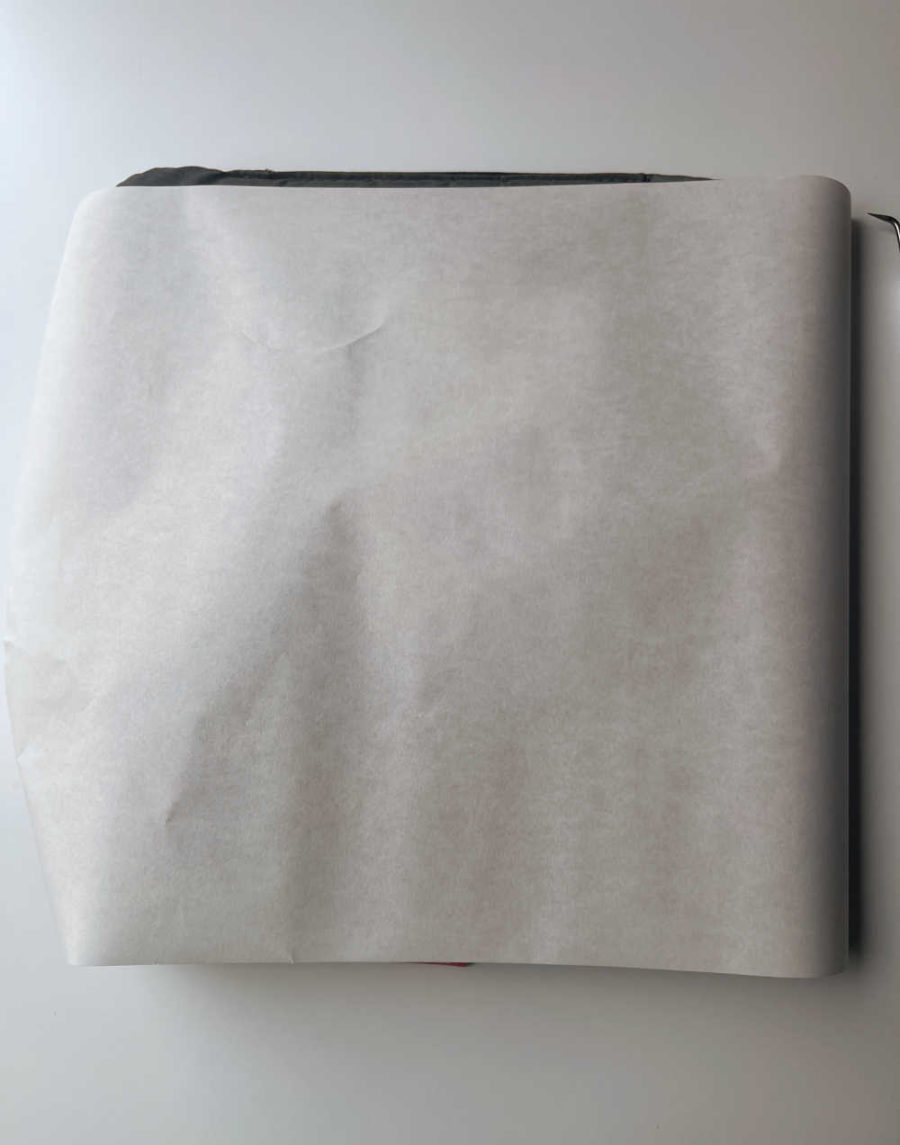
Cover the koozie with butcher paper, which is included in the package of Infusible Ink. You want the butcher paper larger than the EasyPress heat plate.
Preheat the koozie by pressing the EasyPress on the butcher paper for 15 seconds with even, light pressure. Remove the butcher paper and allow the koozie to cool.
Apply Infusible Ink to the Koozie
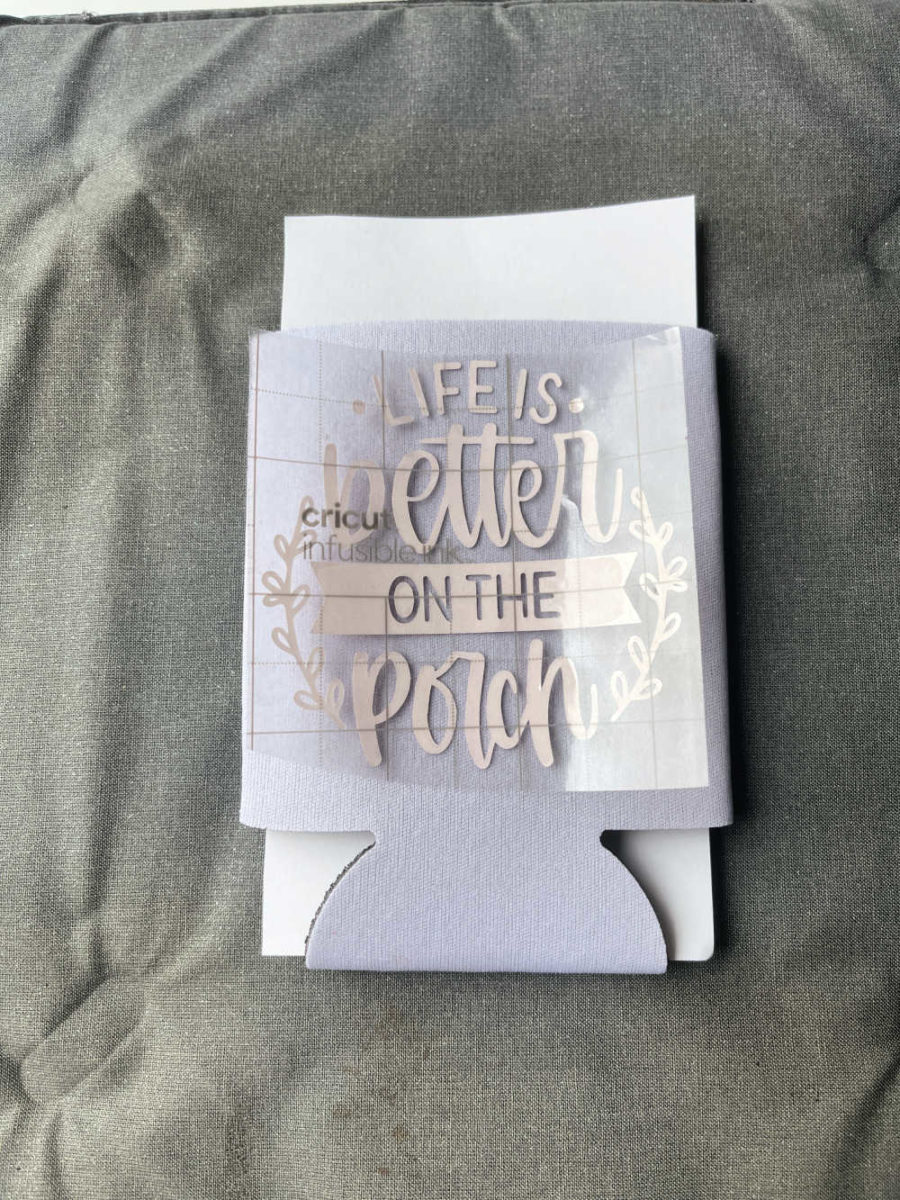
Place the cut design face down on the koozie with the plastic liner facing up. You can use some heat tape to tape the design down if you want. You don't want the design to move at all or it will smudge the ink.
Cover the koozie with a sheet of butcher paper. Using a Cricut EasyPress 2, press at 385°F for 40 seconds using light pressure. Do not slide or move your hands or Cricut EasyPress during transfer or the ink will spread. Keep still while pressing.
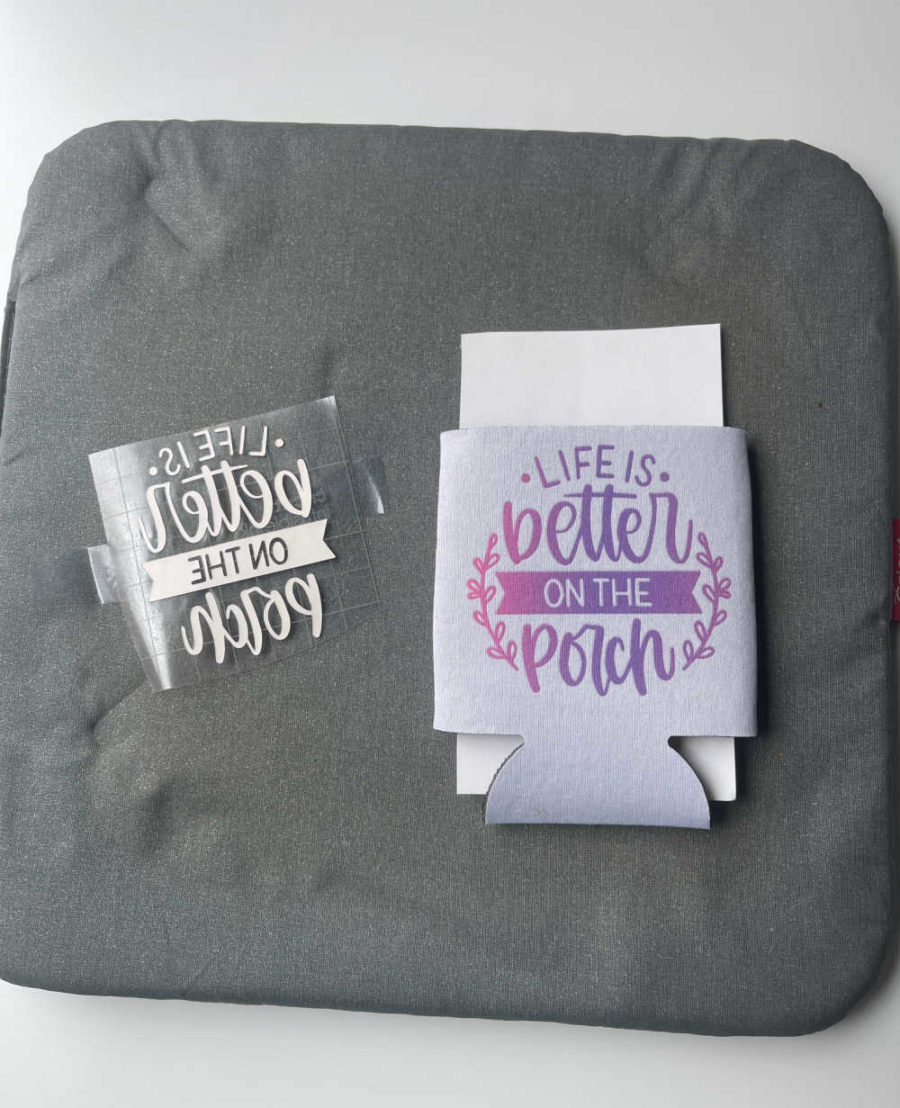
Once the 40 seconds is done, carefully remove the liner while warm. We suggest using tweezers as the plastic sheet and koozie will be hot. You can see how the ink transfers from the Infusible Ink sheet right onto the koozie.
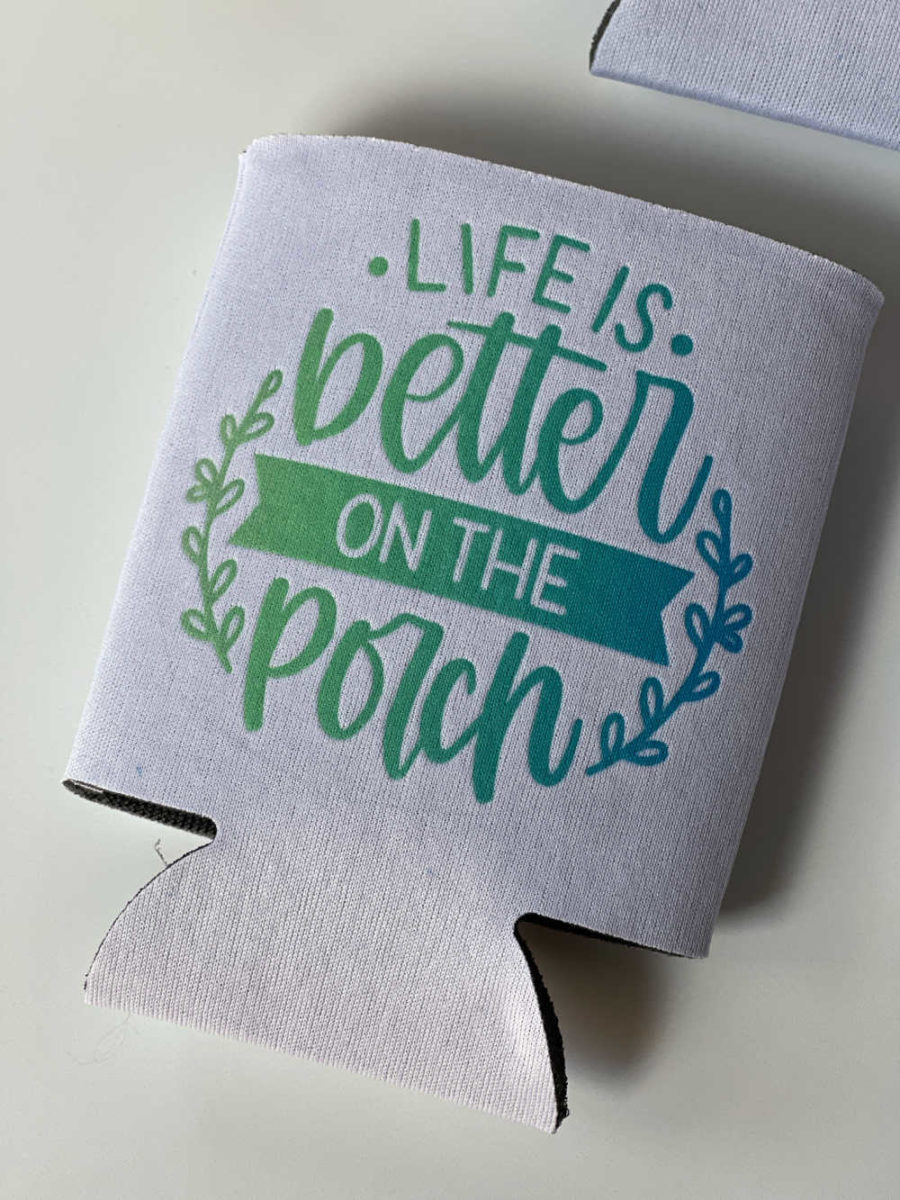
You can use different parts of the Infusible Ink sheets to create different colors and patterns. We tried to make each koozie a little bit different so everyone would know which drink is theirs. Try out other Infusible Ink colors and patterns to make your own personalized version.
Active Time 20 minutes
Total Time 20 minutes
Difficulty Easy
Estimated Cost $2.00
Materials
- Can Koozies compatible with Infusible Ink – we used the ones linked
- Infusible Ink Transfer Sheets – we used the Mermaid Pack
Tools
- Cricut smart cutting machine – we used a Cricut Joy
- Design Space software on mobile device or computer, or Cricut Joy app
- Cricut Heat Transfer Guide
- StandardGrip Machine Mat
- Cricut EasyPress 2, Cricut EasyPress, or Cricut EasyPress Mini
- Cricut EasyPress Mat
- White cardstock (80 lb.)
- Butcher paper – included with the Infusible Ink Transfer Sheets
- Lint roller
- Heat Resistant Tape (optional)
- Scissors
Instructions
- Open Design Space either on your computer or mobile device. Find the project in Design Space.
- Size the design you like to fit your Koozie.
- Click "Make it." Be sure to Mirror your design.
- Cut the Infusible Ink sheets down to the size you need to cut out the design.
- Place the cut sheets onto a StandardGrip mat, liner side down, ink side up.
- Select Infusible Ink Transfer Sheet from the list of materials. If using a Cricut Explore 2 machine, turn the Smart Set Dial to Custom first.
- Load mat and blade into the machine and press Go. The machine will make the cut.
- When done, unload the mat from the machine. Carefully remove the Infusible Ink sheet from the mat.
- Remove the Infusible Ink sheet with the cut design from the mat.
- Use your fingers or tweezers to carefully remove negative pieces from in and around your design, leaving the design on the liner.
- Preheat your Cricut EasyPress. Check the Heat Press transfer guide.
- Trim a piece of white cardstock so that a small piece fits inside the koozie. Use a lint roller to clean off any dust or dirt from the koozie.
- Place the koozie on the EasyPress Mat.
- Cover the koozie with butcher paper, which is included in the package of Infusible Ink. You want the butcher paper larger than the EasyPress heat plate.
- Preheat the koozie by pressing the EasyPress on the butcher paper for 15 seconds with even, light pressure. Remove the butcher paper and allow the koozie to cool.
- Place the cut design face down on the koozie with the plastic liner facing up. You can use some heat tape to tape the design down if you want. You don't want the design to move at all or it will smudge the ink.
- Cover the koozie with a sheet of butcher paper. Using Cricut EasyPress 2, press at 385°F for 40 seconds using light pressure. Do not slide or move your hands or Cricut EasyPress during transfer or the ink will spread. Keep still while pressing.
- Once the 40 seconds is done, carefully remove the liner while warm.
Source: https://growingupgabel.com/cricut-koozie/
0 Response to "Temperatue Setting for Easy Press to Iron on a Koozie"
Post a Comment