What is the Correct Dog Feed Height on a Singer 6215c
Article may contain Amazon & affiliate links. As an Amazon Associate I earn from qualifying purchases at no additional cost to you.
Every type of fabric needs a different sewing machine presser foot adjustment. And incorrect presser foot pressure can cause serious problems to your sewing machine and fabric! Learn how to get the best sewing machine presser foot adjustment with this comprehensive video tutorial! Here you'll learn how to change the presser foot tension on a sewing machine according to your project for the best sewing results every time!
Sewing machine presser foot adjustment
Adjusting the pressure on your presser foot is a very important step you might need to take in each and every sewing project. Setting the correct pressure on the presser foot has a big impact on your sewing project and the quality of the end result. This may be the best kept secret of your sewing machine! And in this short but comprehensive tutorial with video instructions, you'll learn a few simple tips about how to get the perfect sewing machine presser foot adjustment every time!
This tutorial has been converted to a PDF file, available to purchase here. This article is completely free to read.
I'll be referring to Singer sewing machines in this tutorial, since these are the machines I own and worked with. But adjusting presser foot pressure is not only a Singer machines issue, the principle is valid for every sewing machine presser foot.
What is presser foot and presser foot tension?
First a few words about the presser foot and the presser foot pressure (or tension) before proceeding to the actual process of how to adjust the presser foot pressure.
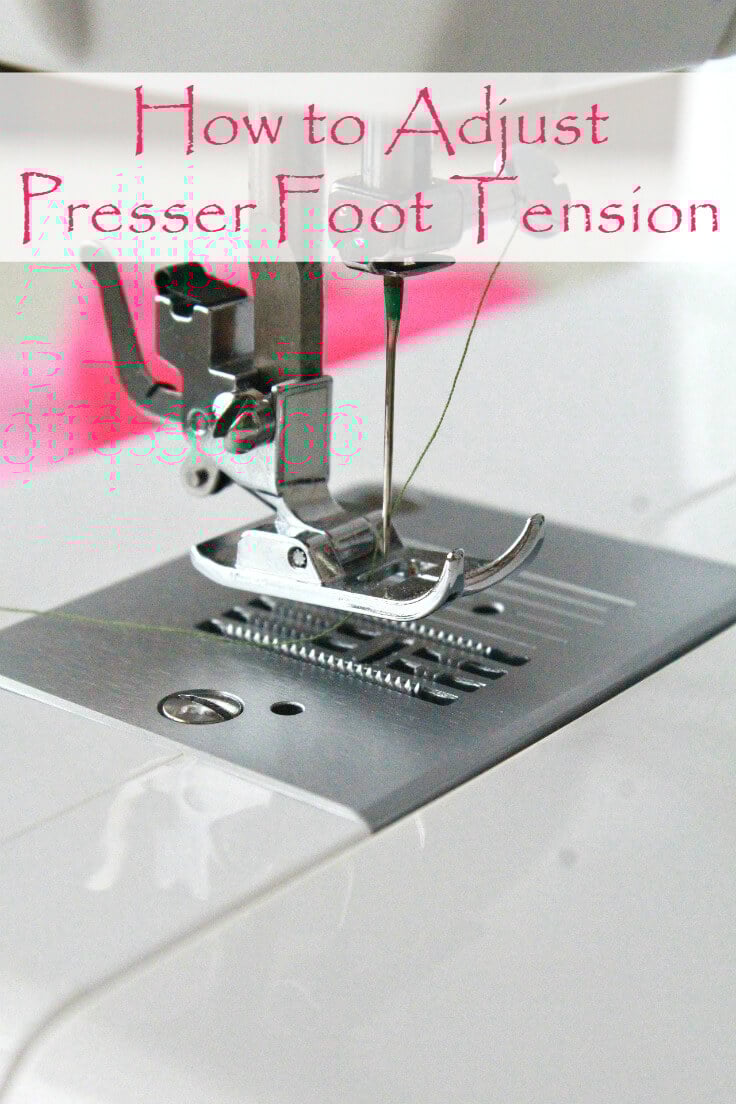
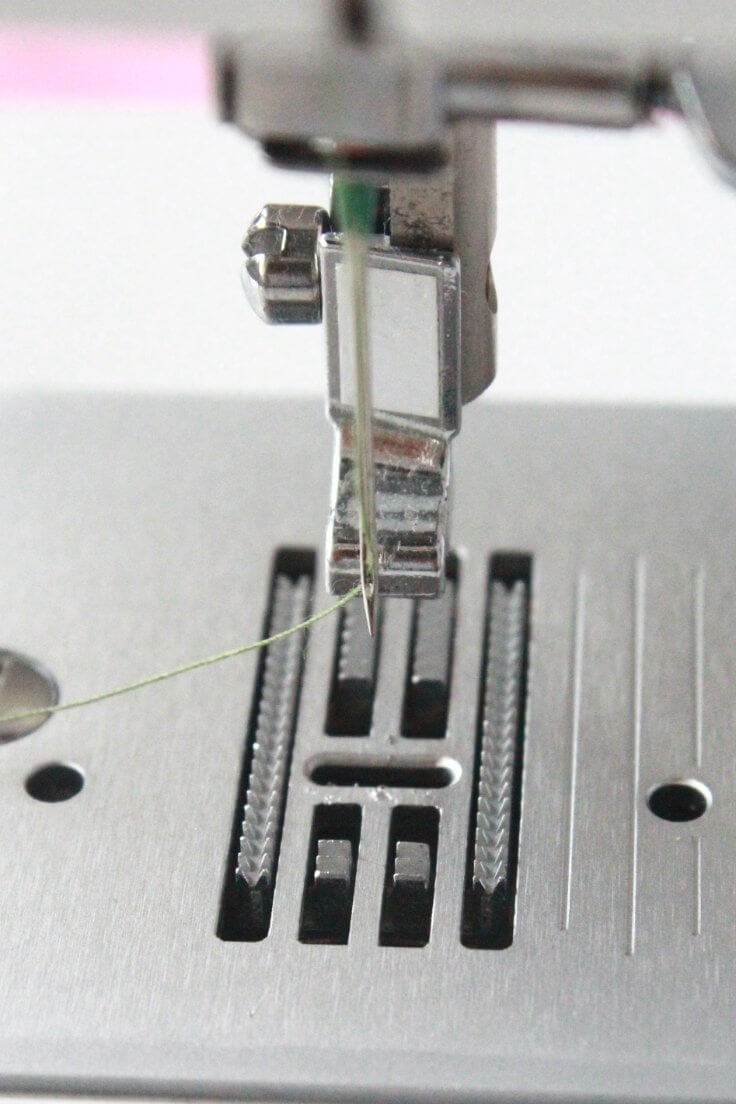
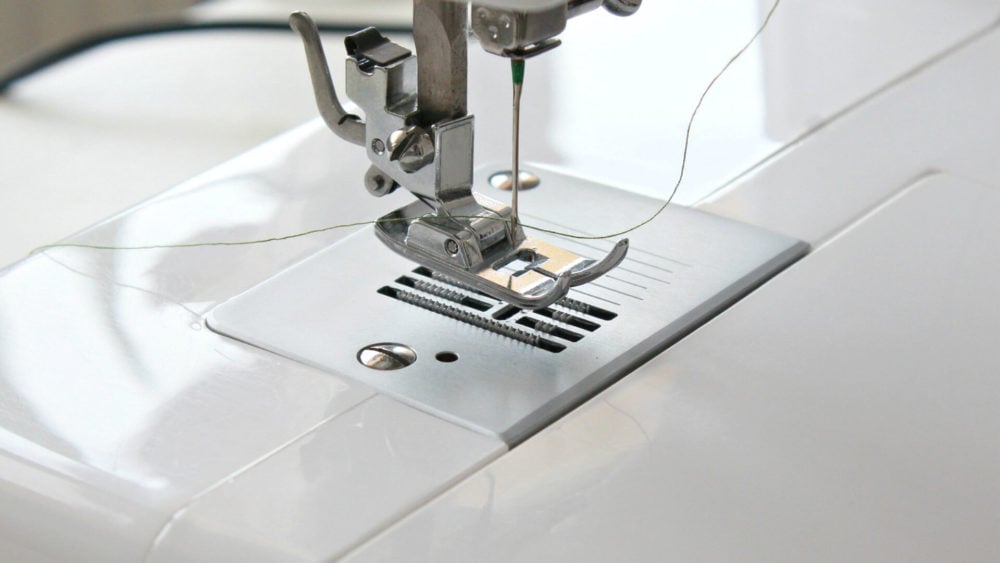
- The presser foot is the footplate of a sewing machine that holds the fabric down onto the part that feeds it under the needle.
- The presser foot tension also known as presser foot pressure simply presses on the fabric so the sewing machine's feed dogs can nicely pull the fabric through.
More tips you might like:
- How to adjust bobbin tension
- Inserting a zipper into a lined skirt
- Hemming lightweight fabrics
- How to add lining to a bag
- How to install magnetic snaps
- Tips & tricks for sewing faster
- Continuous bias binding
- How to install a zipper into a skirt to look concealed
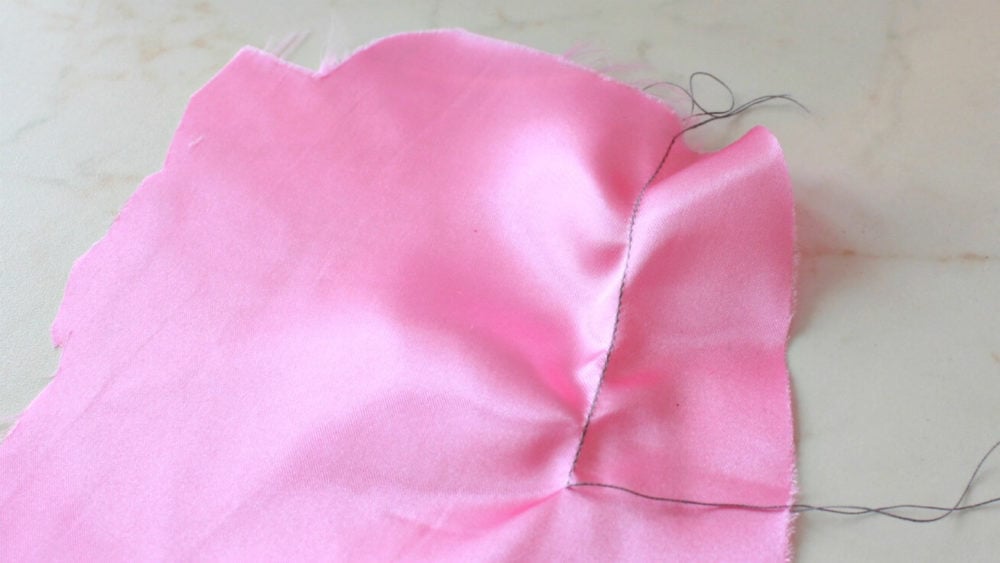
How do you know if the tension in your presser foot is the correct one or you need to exercise some presser foot pressure adjustment? If the presser foot tension is set correctly, your stitches are of the same length and the fabric slides through easily without the need to be pulled, pushed or guided through.
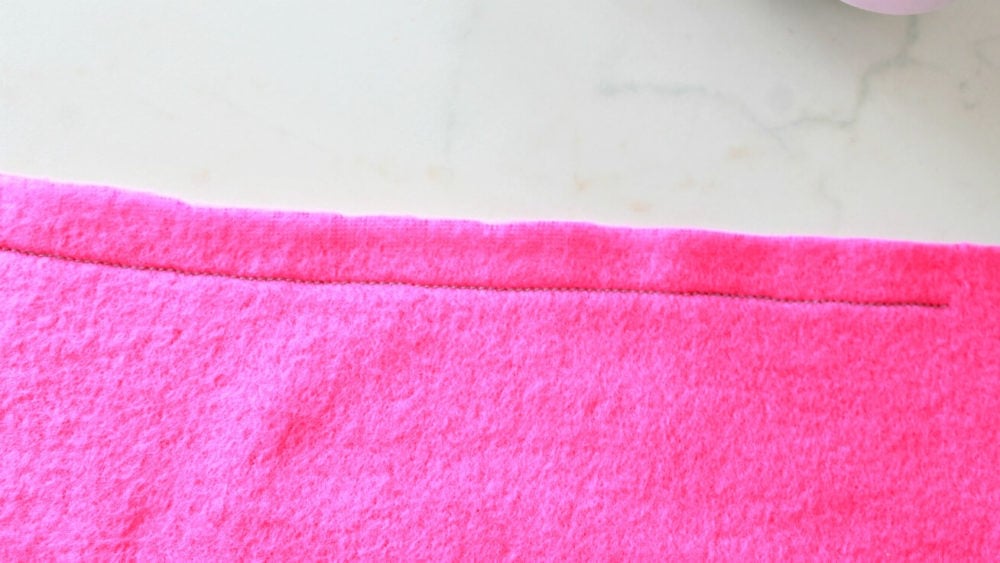
If there's too much pressure put down on the presser foot (presser foot too low), your fabric will pucker. Not enough pressure and the presser foot will also make your fabric pucker or your thread gets tangled, in the front or the back of your sewing project.
Please note before proceeding to make adjustments to the presser foot pressure on your sewing machine: there are various culprits for sewing machine issues, from presser foot tension to bobbin or top tension. These problems can also be related to wrong threading or using the wrong needle or thread type that are not appropriate for your project or even a dirty machine that hasn't been cleaned and oiled in a long time. In my experience, most common problems are threading or needle related. So please don't proceed to changing the presser foot tension or any other tension before ruling out all the other issues.
How to recognize if your presser foot tension is correct or not?
- If the fabric slips away when the presser foot is down, the pressure is too low and you have to increase the tension.
- If the fabric doesn't move and you have to push it to make it slide, you have to lower the tension.
- When you're working with more layers and one of them moves faster than the others, the pressure is wrong and needs to be adjusted.
- When you see skipped stitches or puckered fabric you need to adjust the presser foot pressure: skipped stitches mean the pressure is too low, and puckered fabric means the pressure is too high.
Usually, most sewing machines come with universal pressure setting that is good for most fabrics. So for most projects that use popular fabrics such as cottons, you won't need to make any adjustment. But from time to time, you'll want to sew other fabrics and some fabrics will require pressure adjustment and you need to know how to adjust presser foot on sewing machine to match those type of fabrics (like knits or silk for example).
As a rule of thumb, sewing machine presser foot adjustment works like this: to sew heavy fabrics (or sewing through several layers of fabric, like in quilting), you need to have the presser foot set on lighter pressure, while for lighter fabrics you'll need to set your presser foot tension to a heavier pressure level.
What is the pressure dial on a sewing machine?
Some machines have four to six pressure levels, 1 being the lightest and 4 being the strongest. So, for thick and heavy fabrics, the correct pressure is one; for sewing lightweight fabrics like sheer curtains or chiffon, you have to set it on 3 or 4 (5 or 6 if the dial has more levels).
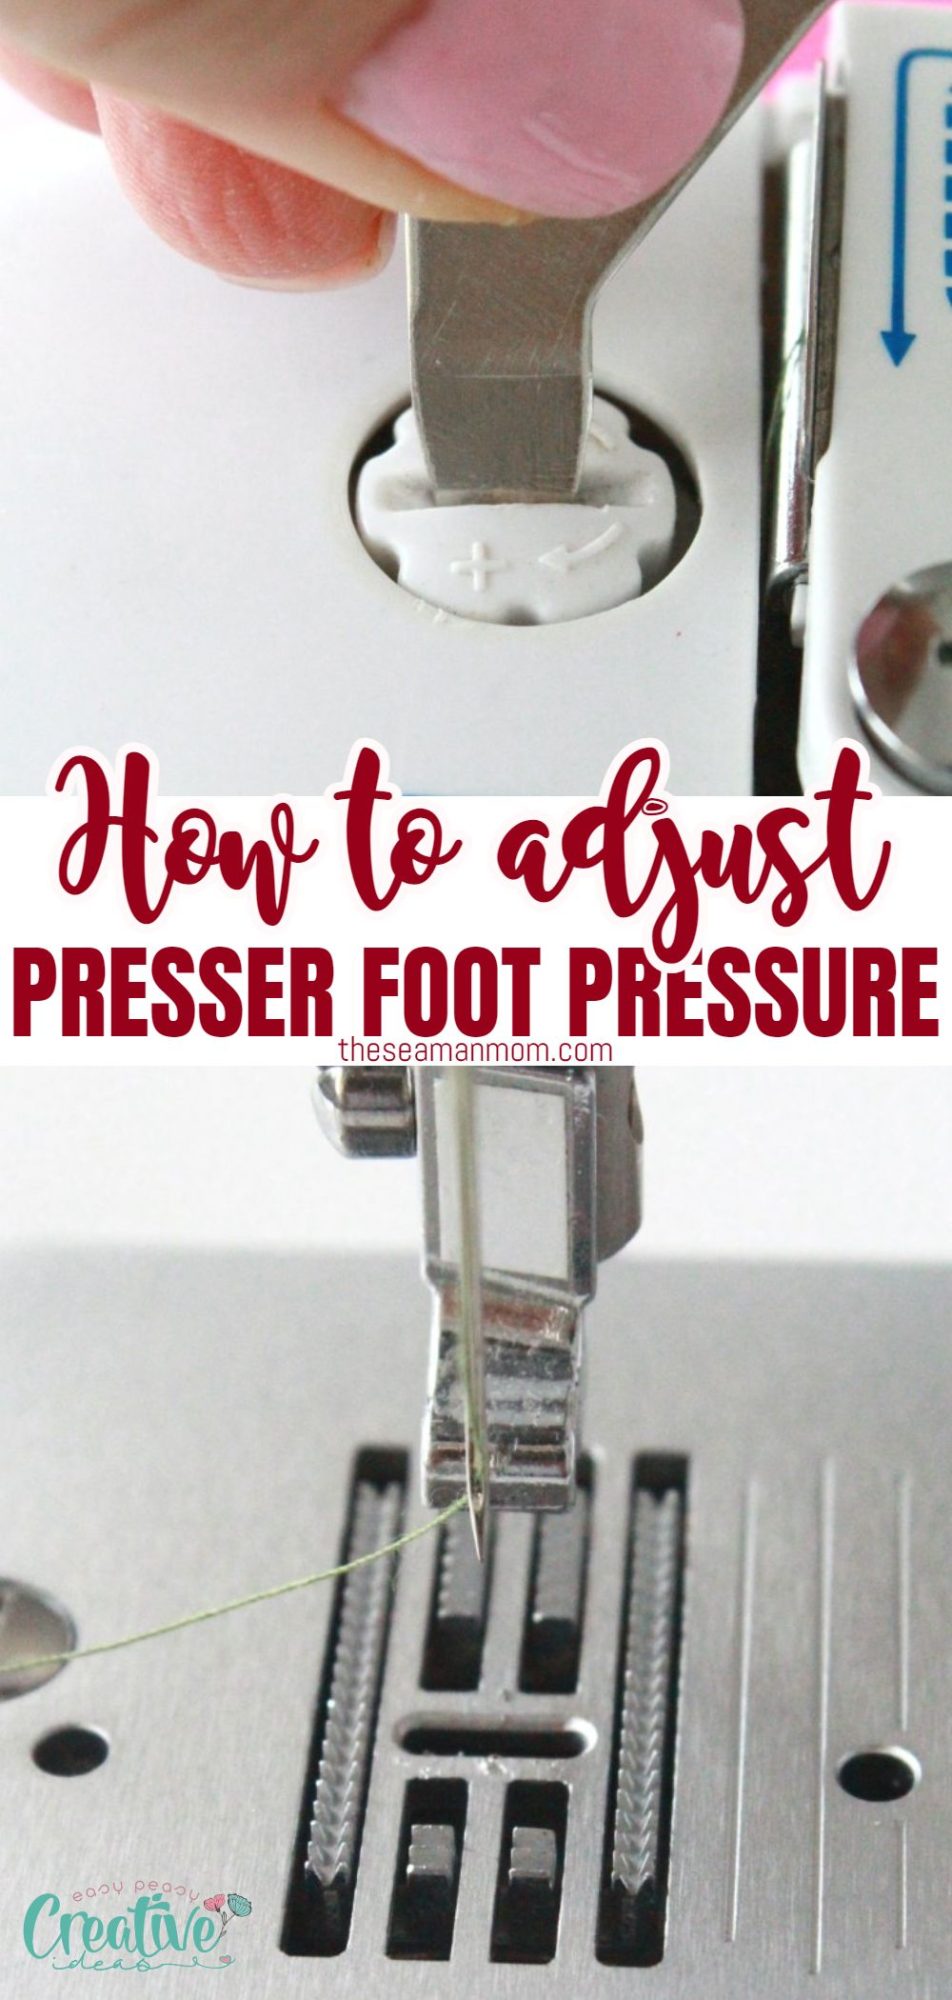
To make the necessary sewing machine presser foot adjustment you'll first need to locate the presser foot regulator for your particular sewing machine. This can be a button, a knob, a dial (on some machines this is small, on others the dial is large), a pin that pops up or a screw. This particular machine in the image below features a screw, the white one with a plus and a minus sign on it.
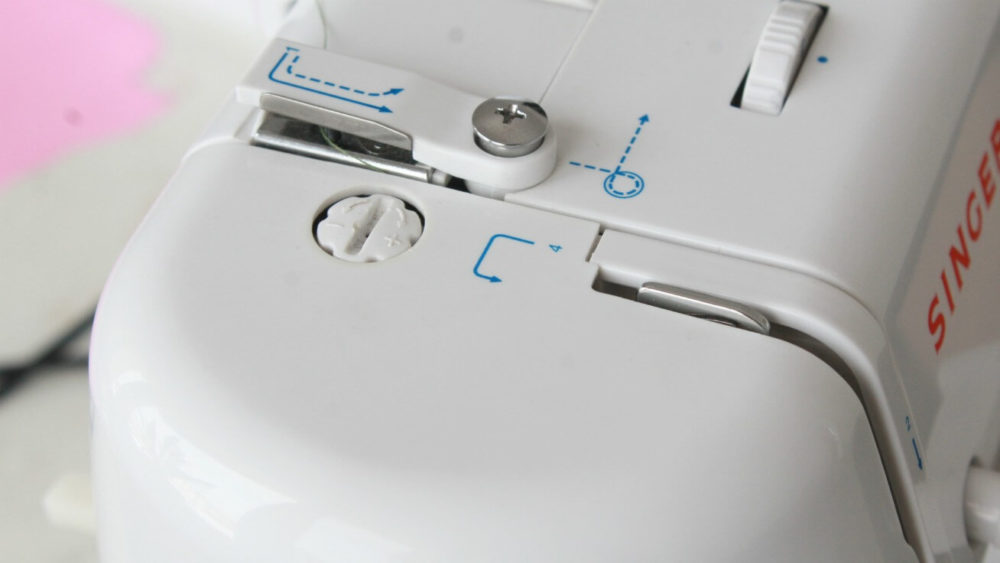
These can be found either on top of the sewing machine, directly above the needle and presser foot or on the side, in the same area as your needle and presser foot.
Don't confuse the presser foot pressure dial with the thread tension dial. The right presser foot pressure will make your fabric slide evenly while stitching, while the correct thread tension will make a nice and smooth stitch without loose or puckering threads. They are both important to make your project look great in the end.
A few related presser foot tension tips to keep in mind
1. Keep in mind that there's also the possibility that the fabric may not feed properly because of the foot itself. Sticky fabrics like faux leather or vinyl may adhere to the metal foot even if the pressure is right.
- To avoid this, change to an ultra-glide foot (like a teflon foot), which is made of a special resin and will help the fabric feed correctly.
- A walking foot can also help you get your fabric running, as it has a set of feed dogs. These, together with the machine's feed dogs, will have a better grip and will feed the fabric better.
2. When working with very thick fabrics or more layers, a longer stitch length will help increase the feed dogs' movement and the fabric will feed a lot better.
3. If you are sure all of your tensions are well set and the fabric or thread still pucker, break or are too loose, you may want to check if your sewing machine is clean or oiled properly. Not oiling the mechanisms can affect the quality of your sewing.
Singer sewing machine presser foot adjustment
Materials:
- Sewing machine
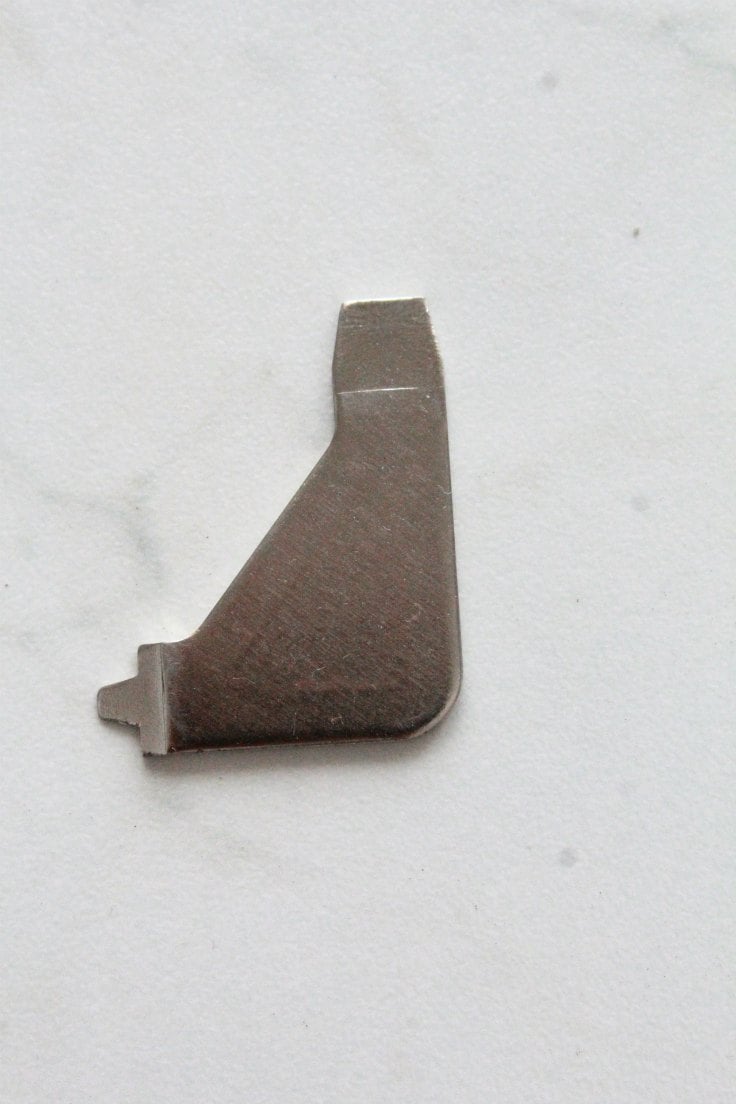
- screw driver (for screws); most machines come equipped with the right tool for that specific type of regulator. Mine comes with a little key you'll see in the images below.
- scraps of fabric to test the pressure as you change it
Directions:
- Locate your presser foot tension regulator
- If your regulator is a dial, spin it towards the plus sign to tighten the pressure. Spin towards the minus to loosen it.
- If you have a pin, pressing down the pin will make it pop up and will create a light pressure, needed for heavy fabric. Press down on the pin again to create heavy pressure if you are sewing light fabric.
- In case you have a knob, it usually comes with an indicator next to it. Pressing up or down the indicator will increase or reduce pressure on your presser foot.
- If your machine has a screw, use the screwdriver to turn the screw and change the presser foot tension. Turning the screw clockwise or towards a plus sign will create heavy pressure. When turning it counterclockwise or towards the minus sign, it will give you light pressure.
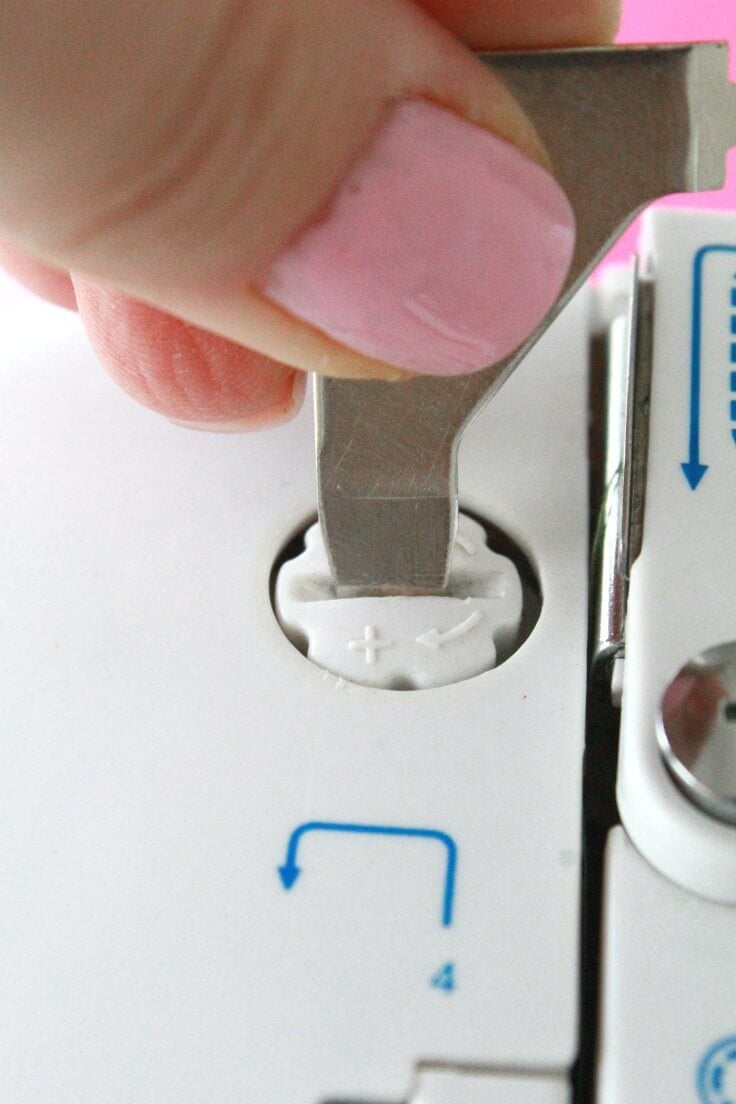
This is my screwdriver/key that came with the sewing machine. If you own a Singer, chances are yours looks pretty similar.
- Before starting working on a new sewing project, test the pressure foot tension. Sew on a scrap of fabric that is the same thickness as your project. Adjust pressure according to your results. You have the right settings when:
- the fabric doesn't pucker,
- the thread is not tangled,
- your stitches are of the same length
- and the fabric slides through the feeding dogs smoothly.
Pin to save for later
Most popular sewing projects:
- Tips for sewing a round hem
- Corded bag handles
- Flutter sleeve dress pattern
- How to laminate cotton fabric
Source: https://theseamanmom.com/change-presser-foot-pressure-sewing-machine/
0 Response to "What is the Correct Dog Feed Height on a Singer 6215c"
Post a Comment